How to Fix a Zipper - Comprehensive Guide to Restoring Functionality
How to Fix a Zipper: Comprehensive Guide to Restoring Functionality
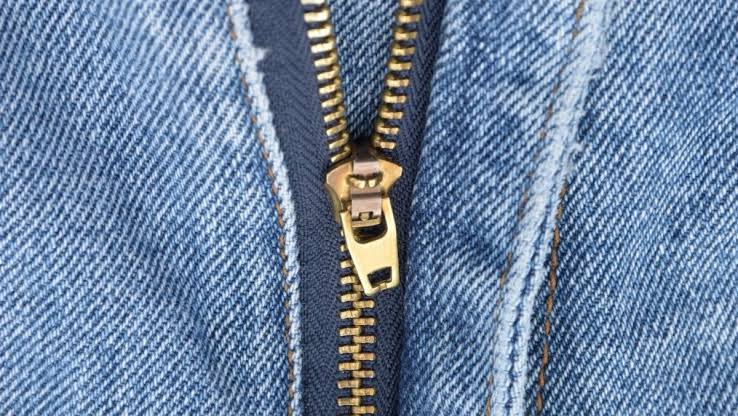
Zippers are indispensable components of everyday items, from clothing and bags to tents and furniture covers. When a zipper malfunctions, it can disrupt daily routines, but the good news is that most zipper issues can be resolved with simple techniques and tools. At How To Fix, we provide expert solutions for all kinds of home and tech problems, including detailed steps to fix a zipper efficiently. This guide offers a step-by-step approach to diagnosing and repairing common zipper problems, ensuring durability and functionality without needing professional help.
Understanding Common Zipper Problems
Before diving into repair methods, identifying the specific issue with the zipper is crucial. Common problems include stuck zippers, misaligned teeth, broken sliders, or separated zippers. Each issue requires a tailored approach to restore smooth operation.
- Stuck Zipper: Dirt, fabric, or debris often causes a zipper to jam, preventing smooth movement.
- Misaligned Teeth: Teeth that don’t interlock properly can cause the zipper to malfunction or open unexpectedly.
- Broken Slider: A worn or damaged slider may fail to engage the teeth, rendering the zipper unusable.
- Separated Zipper: The zipper may open even after being zipped up, often due to a loose or damaged slider.
- Missing Teeth: Missing or broken teeth can prevent the zipper from closing properly, requiring more extensive repairs.
By pinpointing the problem, we can apply the most effective solution, saving time and ensuring lasting results.
Tools Needed to Fix a Zipper
To fix a zipper, having the right tools on hand simplifies the process. Most of these items are likely already available in your home or easily sourced:
- Needle-nose pliers
- Small screwdriver
- Lubricants (e.g., candle wax, soap bar, petroleum jelly, or graphite pencil)
- Tweezers
- Scissors
- Replacement zipper slider (if needed)
- Thread and needle or sewing kit
- Cotton swabs or a small brush
- Mild soap and water
- Replacement zipper (for severe cases)
With these tools, we can tackle nearly any zipper repair, from minor adjustments to replacing components.
Step-by-Step Guide to Fixing a Stuck Zipper
A stuck zipper is one of the most common issues, often caused by debris or fabric caught in the slider. Follow these steps to free it:
- Inspect the Zipper: Gently tug the zipper to identify where it’s stuck. Look for visible debris, threads, or fabric caught in the teeth or slider.
- Clean the Zipper: Use a cotton swab or small brush dipped in mild soap and water to clean the affected area. Avoid excessive water on delicate fabrics like silk.
- Apply Lubricant: Rub a graphite pencil, candle wax, or a bar of soap along the zipper teeth to reduce friction. Alternatively, apply a small amount of petroleum jelly with a cotton swab.
- Work the Zipper: Gently move the slider back and forth to loosen the obstruction. Apply steady, even pressure to avoid damaging the teeth.
- Test the Zipper: Once freed, zip and unzip several times to ensure smooth operation. If resistance persists, repeat the lubrication process.
This method resolves most stuck zippers without causing damage to the surrounding material.
Repairing Misaligned Zipper Teeth
When zipper teeth don’t align properly, the zipper may fail to close or stay closed. This issue often stems from bent teeth or an overstretched zipper track.
- Examine the Teeth: Look for bent or misaligned teeth using a magnifying glass if necessary.
- Straighten Bent Teeth: Use needle-nose pliers to gently realign bent teeth. Work slowly to avoid breaking them.
- Tighten the Slider: If the slider is loose, gently squeeze its sides with pliers to improve its grip on the teeth. Be cautious not to crush the slider.
- Test the Alignment: Zip and unzip to check if the teeth interlock correctly. If misalignment persists, the slider may need replacement.
Proper alignment restores the zipper’s functionality and prevents further issues.
Replacing a Broken Zipper Slider
A broken slider is a common culprit behind a malfunctioning zipper. Replacing it is straightforward with the right approach:
- Remove the Old Slider: If the slider is still attached, locate the zipper stop (a metal or plastic piece at the bottom). Use a small screwdriver or pliers to carefully remove the stop, allowing the slider to come off.
- Select a Compatible Slider: Ensure the replacement slider matches the size and type of the original (e.g., metal, plastic, or coil zipper). Check the number or letter on the back of the old slider for reference.
- Install the New Slider: Thread the new slider onto the zipper track, ensuring it aligns with the teeth on both sides. Pull the slider up to test its movement.
- Reattach the Zipper Stop: Sew a new stop using a needle and thread or crimp a metal stop with pliers to secure the slider in place.
- Test the Zipper: Zip and unzip multiple times to confirm smooth operation.
This repair extends the life of the zipper without replacing the entire unit.
Fixing a Separated Zipper
A separated zipper opens after being zipped, often due to a loose slider or worn teeth. Here’s how to address it:
- Check the Slider: Inspect the slider for wear or looseness. If it’s loose, gently squeeze the sides with needle-nose pliers to tighten its grip.
- Lubricate the Teeth: Apply a lubricant like candle wax or graphite to reduce friction and improve tooth engagement.
- Test the Zipper: Zip up slowly to ensure the teeth interlock properly. If the zipper continues to separate, the slider or teeth may be too worn.
- Replace the Slider: If tightening doesn’t work, follow the steps above to replace the slider.
- Sew Over the Problem Area: For minor separations near the bottom, sew a few stitches over the teeth to create a new stop, preventing the slider from moving past the damaged section.
This approach often resolves separation issues without replacing the entire zipper.
Addressing Missing or Broken Zipper Teeth
Missing zipper teeth require more effort to repair, as they affect the zipper’s ability to close properly. Depending on the severity, we may repair or replace the zipper:
- Assess the Damage: If only a few teeth are missing, a partial repair may suffice. Extensive damage may necessitate full zipper replacement.
- Sew Around Missing Teeth: Use a needle and thread to sew tightly over the gap where teeth are missing. This creates a makeshift stop to keep the zipper functional.
- Replace the Zipper: For significant damage, remove the old zipper by carefully cutting the stitches holding it in place. Measure the length and type of the original zipper, then purchase a matching replacement. Sew the new zipper into place using a sewing machine or hand stitches for precision.
- Test the Repair: Zip and unzip to ensure the new zipper or repaired section functions smoothly.
While replacing a zipper is more involved, it’s a cost-effective alternative to replacing the item.
Maintaining Zippers to Prevent Future Issues
Preventive maintenance extends the life of zippers and reduces the need for repairs. Incorporate these habits into your routine:
- Regular Cleaning: Periodically clean zippers with a small brush and mild soap to remove dirt and debris.
- Lubrication: Apply a thin layer of wax or graphite every few months to keep zippers gliding smoothly.
- Avoid Overloading: Don’t force zippers on overfilled bags or tight clothing, as this strains the teeth and slider.
- Store Properly: Store items with zippers in a dry, dust-free environment to prevent corrosion or debris buildup.
- Inspect Regularly: Check zippers for early signs of wear, such as loose sliders or bent teeth, and address them promptly.
These practices ensure zippers remain functional for years.
Fixing Zippers on Different Materials
The repair process may vary depending on the material the zipper is attached to, such as fabric, leather, or heavy-duty items like tents.
Fabric Zippers (Clothing and Bags)
For clothing or fabric bags, use a needle and thread to reinforce loose stitching around the zipper. If replacing the zipper, choose a lightweight replacement that matches the fabric’s weight and color.
Leather Zippers
Leather requires careful handling to avoid damage. Use a leather needle for sewing and avoid excessive force when manipulating the zipper. Apply leather conditioner after repairs to maintain suppleness.
Heavy-Duty Zippers (Tents and Luggage)
Heavy-duty zippers often require stronger tools, such as larger pliers or industrial-strength sliders. Ensure replacements are rated for outdoor or heavy use to withstand wear.
When to Replace the Entire Zipper
In some cases, repairing a zipper isn’t feasible, such as when multiple teeth are missing or the fabric around the zipper is torn. To replace a zipper:
- Remove the Old Zipper: Carefully cut the stitches securing the zipper, taking care not to damage the surrounding material.
- Measure and Purchase: Measure the length and type of the original zipper. Choose a replacement with matching specifications.
- Sew the New Zipper: Pin the new zipper in place, ensuring alignment with the fabric. Use a sewing machine for sturdy, even stitches or hand-sew for delicate materials.
- Test the Installation: Zip and unzip several times to confirm proper function and alignment.
This process restores functionality to items that would otherwise be unusable.
Troubleshooting Persistent Zipper Issues
If repairs don’t resolve the issue, consider these additional steps:
- Check for Hidden Debris: Use tweezers to remove small particles lodged deep in the zipper track.
- Inspect the Fabric: Torn or frayed fabric around the zipper may interfere with its operation. Sew or patch the fabric to stabilize it.
- Consult a Professional: For high-value items or complex repairs, a tailor or repair shop may offer specialized services.
Persistent issues may indicate the need for a full replacement or professional intervention.
Eco-Friendly Benefits of Fixing Zippers
Repairing zippers aligns with sustainable practices by extending the life of clothing, bags, and other items. By fixing zippers, we reduce waste, save money, and minimize the environmental impact of manufacturing new products. This approach supports a circular economy and promotes mindful consumption.
Final Thoughts on Zipper Repair
Mastering how to fix a zipper empowers us to maintain our belongings with confidence. Whether addressing a stuck zipper, misaligned teeth, or a broken slider, the techniques outlined in this guide provide reliable solutions. At How To Fix, we are committed to delivering practical, detailed advice for solving everyday problems. By following these steps and maintaining zippers proactively, we can ensure their longevity and functionality, saving time and resources.