How to Fix Scratches on a Car: A Comprehensive Guide to Restoring Your Vehicle’s Shine
How to Fix Scratches on a Car: A Comprehensive Guide to Restoring Your Vehicle’s Shine
At How To Fix, we understand the frustration of discovering scratches on your car’s pristine surface. Whether it’s a minor surface scratch or a deeper gouge, addressing these imperfections promptly can restore your vehicle’s appearance and protect its value. This detailed guide provides step-by-step instructions, expert tips, and professional techniques to fix scratches on a car, ensuring a flawless finish. We cover everything from assessing the damage to applying the final polish, empowering you to tackle car scratch repair with confidence.
Understanding Car Scratches: Types and Severity
Before attempting to fix scratches on a car, it’s essential to identify the type and severity of the scratch. Car scratches vary in depth, affecting different layers of your vehicle’s surface. Here’s a breakdown of the common types:
Clear Coat Scratches
These are the most superficial scratches, affecting only the clear coat, the protective layer over your car’s paint. They often appear as faint white marks or swirls and are the easiest to repair. Common causes include light brush contact, improper washing techniques, or minor debris.
Paint Scratches
These scratches penetrate the paint layer, exposing the color beneath the clear coat. They may appear as deeper lines with a slightly different color than the surrounding paint. Paint scratches require more effort to repair but are manageable with the right tools.
Primer Scratches
Deeper scratches that reach the primer layer expose a gray or white base beneath the paint. These scratches are more noticeable and may require touch-up paint for a seamless repair.
Metal Scratches
The most severe scratches reach the metal or substrate of the car’s body. These deep gouges often require professional intervention, as they may involve rust prevention and extensive repainting.
To determine the scratch type, gently run your fingernail across the mark. If it catches, the scratch likely extends beyond the clear coat. For precise assessment, use a magnifying glass or consult a professional at a reputable auto body shop.
Essential Tools and Materials for Car Scratch Repair
To fix scratches on a car, we recommend gathering high-quality tools and materials to ensure a professional result. Here’s what you’ll need:
- Microfiber cloths: Soft, lint-free cloths for cleaning and polishing.
- Car wash soap: A pH-balanced soap designed for automotive use.
- Rubbing alcohol or isopropyl alcohol: For cleaning the scratched area.
- Sandpaper: Wet/dry sandpaper (1500-3000 grit) for deeper scratches.
- Polishing compound: A mild abrasive to smooth out scratches.
- Wax or sealant: To protect the repaired area.
- Touch-up paint: Matching your car’s exact color code for paint or primer scratches.
- Clear coat pen: For sealing touch-up paint.
- Polishing pad or buffer: For applying polishing compounds evenly.
- Masking tape: To protect surrounding areas during repair.
- Spray bottle with water: For wet sanding.
- Gloves and safety glasses: For personal protection.
Always verify your car’s paint code (found in the owner’s manual or on the driver’s side door jamb) to ensure a perfect color match for touch-up paint.
Step-by-Step Guide to Fix Scratches on a Car
Step 1: Clean the Scratched Area Thoroughly
Start by washing the scratched area with car wash soap and water to remove dirt, debris, and contaminants. Rinse thoroughly and dry with a microfiber cloth. For stubborn grime, use rubbing alcohol to clean the surface, ensuring no residue interferes with the repair process. A clean surface prevents further scratching during sanding or polishing.
Step 2: Assess the Scratch Depth
Examine the scratch under good lighting to determine its severity. For clear coat scratches, proceed to polishing. For paint or primer scratches, you may need to sand and apply touch-up paint. Deep metal scratches may require professional assistance, but we’ll cover basic steps for addressing them at home.
Step 3: Sand the Scratch (For Paint or Primer Scratches)
For scratches deeper than the clear coat, light sanding is necessary to smooth the surface. Follow these steps:
- Apply masking tape around the scratch to protect unaffected areas.
- Soak 1500-grit sandpaper in water for 10 minutes.
- Gently sand the scratch using light, circular motions, keeping the sandpaper wet to minimize damage.
- Progress to 2000-grit or 3000-grit sandpaper for a smoother finish.
- Wipe the area with a microfiber cloth and inspect the surface. The scratch should appear smoother and less pronounced.
Avoid excessive sanding, as it can remove too much paint or clear coat, complicating the repair.
Step 4: Apply Touch-Up Paint (For Paint or Primer Scratches)
If the scratch extends into the paint or primer, touch-up paint is essential for a seamless repair:
- Shake the touch-up paint bottle thoroughly to mix the color.
- Use the applicator brush (included with most touch-up paint kits) to apply a thin layer of paint to the scratch.
- Allow the paint to dry for 30-60 minutes, depending on the manufacturer’s instructions.
- Apply additional layers if necessary, ensuring each layer is thin to avoid clumping.
- Once the paint matches the surrounding area, apply a clear coat pen to seal the repair and add shine.
- Let the clear coat dry for at least 24 hours.
For best results, apply touch-up paint in a well-ventilated area with temperatures between 60-80°F (15-27°C).
Step 5: Polish the Repaired Area
Polishing restores the shine and blends the repaired area with the surrounding paint. For clear coat scratches, polishing may be the only step needed:
- Apply a small amount of polishing compound to a microfiber cloth or polishing pad.
- Work the compound into the scratched area using circular motions, applying light pressure.
- Continue polishing until the scratch fades and the surface feels smooth.
- Wipe away excess compound with a clean microfiber cloth.
- Inspect the area under direct light to ensure the scratch is no longer visible.
For larger areas, use a dual-action polisher to achieve a consistent finish. Avoid over-polishing, as it can thin the clear coat.
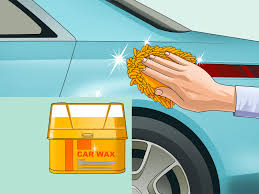
Step 6: Wax and Seal the Surface
To protect the repaired area and enhance shine, apply a car wax or sealant:
- Apply a small amount of wax to a microfiber cloth or applicator pad.
- Work the wax into the repaired area using circular motions.
- Buff the area with a clean microfiber cloth to reveal a glossy finish.
- For added protection, apply a synthetic sealant to lock in the shine and shield against UV rays and environmental damage.
Regular waxing every 3-6 months helps maintain the repair and prevents future scratches.
Advanced Techniques for Deep Scratches and Metal Damage
For metal scratches, additional steps are required to prevent rust and restore the surface:
- Remove Rust: If rust is present, use a rust remover or fine sandpaper (800-grit) to clean the area. Wipe with rubbing alcohol to remove residue.
- Apply Primer: Use an automotive primer to cover exposed metal. Apply thin layers, allowing each to dry completely.
- Sand and Paint: Follow the sanding and touch-up paint steps outlined above, ensuring the primer is fully covered.
- Professional Assistance: For extensive damage or complex curves (e.g., near door handles), consult a professional auto body shop to avoid uneven results.
Deep scratches may also benefit from wet sanding with finer grits (up to 5000-grit) for a smoother blend.
Preventing Future Scratches on Your Car
Prevention is key to maintaining your car’s flawless appearance. We recommend the following tips:
- Wash Properly: Use a two-bucket wash method (one for soap, one for rinsing) to minimize swirl marks.
- Use Microfiber: Always dry and polish with microfiber cloths to avoid abrasive contact.
- Apply Ceramic Coating: A ceramic coating adds a durable protective layer, reducing the risk of scratches.
- Park Strategically: Avoid tight parking spaces or areas with heavy foot traffic to minimize accidental scratches.
- Regular Maintenance: Wax or seal your car every 3-6 months to protect the clear coat.
Common Mistakes to Avoid When Fixing Car Scratches
To achieve a professional-quality repair, steer clear of these pitfalls:
- Using Incorrect Paint: Always match the car’s paint code to avoid visible patches.
- Over-Sanding: Excessive sanding can damage the clear coat or paint, requiring costly repairs.
- Skipping Cleaning: Failing to clean the area thoroughly can trap debris, worsening the scratch.
- Rushing the Process: Allow adequate drying time for paint and clear coat to ensure a smooth finish.
- Ignoring Deep Scratches: Attempting to polish deep scratches without paint or primer can worsen the damage.
When to Seek Professional Help
While many scratches can be fixed at home, certain situations warrant professional expertise:
- Large or Deep Scratches: Gouges exposing metal or covering large areas may require specialized equipment.
- Complex Surfaces: Scratches on curves, edges, or textured surfaces (e.g., bumpers) are challenging to repair without professional tools.
- Color Matching Issues: If you can’t find an exact paint match, a professional can blend the repair seamlessly.
- Rust Damage: Extensive rust requires professional treatment to prevent structural damage.
Contact a trusted auto body shop for an assessment if you’re unsure about the repair process.
Cost of Fixing Car Scratches: DIY vs. Professional
DIY Costs
Repairing scratches at home is cost-effective, with expenses typically ranging from $20-$100:
- Polishing compound: $10-$20
- Touch-up paint: $15-$30
- Sandpaper and cloths: $5-$15
- Wax or sealant: $10-$25
Professional Costs
Professional repairs vary based on scratch severity and location:
- Minor scratches: $100-$500
- Deep scratches or repainting: $500-$1,500
- Full panel replacement: $1,000-$3,000+
DIY repairs save money but require time and precision. For high-value or luxury vehicles, professional repairs may be worth the investment to preserve resale value.
Choosing the Right Products for Car Scratch Repair
Selecting high-quality products ensures lasting results. We recommend:
- Meguiar’s ScratchX 2.0: Ideal for clear coat scratches, offering a balance of abrasion and polish.
- 3M Wetordry Sandpaper: Durable and effective for wet sanding.
- Turtle Wax Color Magic: A versatile polish for minor scratches with added color enhancement.
- Dupli-Color Touch-Up Paint: Widely available with precise color matching.
- Chemical Guys Sealant: Provides long-lasting protection post-repair.
Always read product reviews and test on a small area before full application.
Maintaining Your Car’s Finish After Scratch Repair
To keep your car looking pristine after repair:
- Wash Weekly: Regular washing prevents dirt buildup that can cause new scratches.
- Apply Wax Regularly: Wax every 3-6 months to maintain shine and protection.
- Inspect Frequently: Check for new scratches or chips early to simplify repairs.
- Use Car Covers: Protect your vehicle from environmental damage when parked outdoors.
Frequently Asked Questions About Car Scratch Repair
Can I Use Household Items to Fix Car Scratches?
Household items like toothpaste or nail polish may temporarily mask minor scratches but can damage the clear coat. We recommend automotive-specific products for safe, effective repairs.
How Long Does It Take to Fix a Car Scratch?
Minor clear coat scratches take 1-2 hours to polish. Paint or primer scratches may require 4-6 hours, including drying time. Deep scratches can take days if multiple paint layers are needed.
Will Fixing a Scratch Affect My Car’s Resale Value?
Properly repaired scratches using color-matched paint and professional techniques should not significantly impact resale value. Poor repairs, however, may be noticeable to buyers.
Can I Drive Immediately After Repairing a Scratch?
Avoid driving for at least 24 hours after applying touch-up paint or clear coat to ensure proper curing. Polished clear coat scratches are safe to drive immediately.
Conclusion: Restore Your Car’s Beauty with Confidence
Fixing scratches on a car doesn’t have to be daunting. With the right tools, techniques, and patience, we can restore your vehicle’s appearance to its former glory. By following this comprehensive guide from How To Fix, you’ll tackle car scratch repair like a pro, saving time and money while preserving your car’s value. From minor clear coat scratches to deeper paint damage, our step-by-step instructions ensure a flawless finish. Start today, and enjoy a scratch-free, showroom-ready car!